Quickstart: Your First Device Online
This page takes a new organisation from nothing to a device running a container. The dashboard's setup guide does most of it for you; the same steps are listed below if you would rather do them by hand. It finishes with an example container you can use to confirm everything works before you bring your own software.
The Setup Guide
The dashboard setup guide (https://app.admrl.co/get-started) covers everything in four steps. New organisations are taken there automatically the first time an owner, admin, or member opens the dashboard.
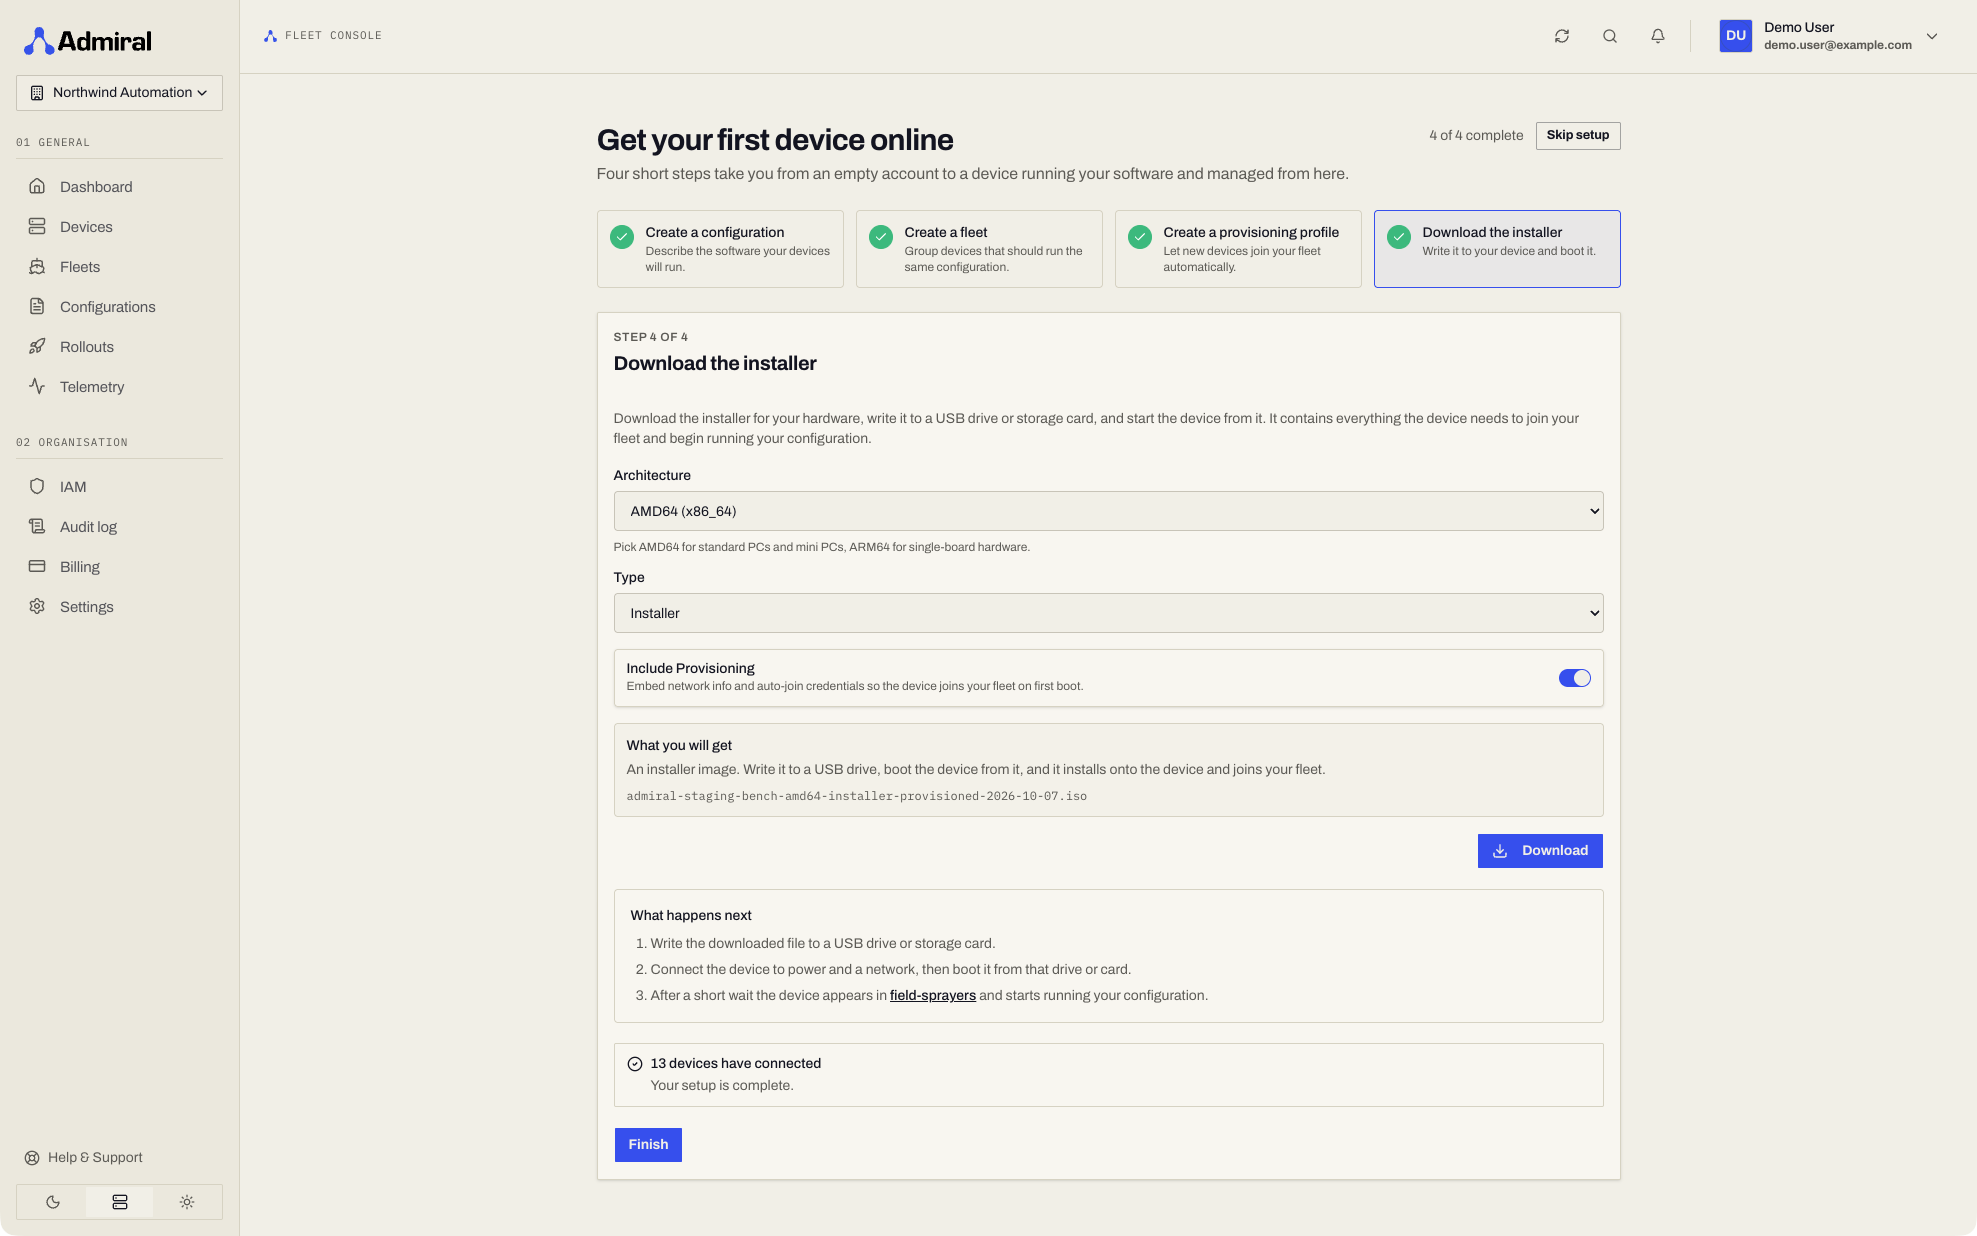
Each step unlocks once the previous one is done. Progress is worked out from what already exists in your organisation, so you can leave and come back at any time; Skip setup closes the guide.
Step 1: Create a Configuration
A configuration describes the workload your devices run: its container image, environment, volumes, and hardware access.
Select an existing configuration, or click Create configuration to open the configuration editor. No container yet? Use the example container. Click Continue.
Step 2: Create a Fleet
A fleet groups devices that run the same configuration.
Enter a name (and optionally a description and location) and click Create fleet and continue. The fleet is created with the configuration from step 1 already assigned. To use a fleet you already have instead, pick it under Or use a fleet you already have and click Use this fleet; it is switched to the chosen configuration.
Step 3: Create a Provisioning Profile
A provisioning profile produces installer images that join devices to your fleet on first boot without manual pairing.
Accept the suggested name (<fleet> installer) or change it, add optional tags, and click Create profile and continue.
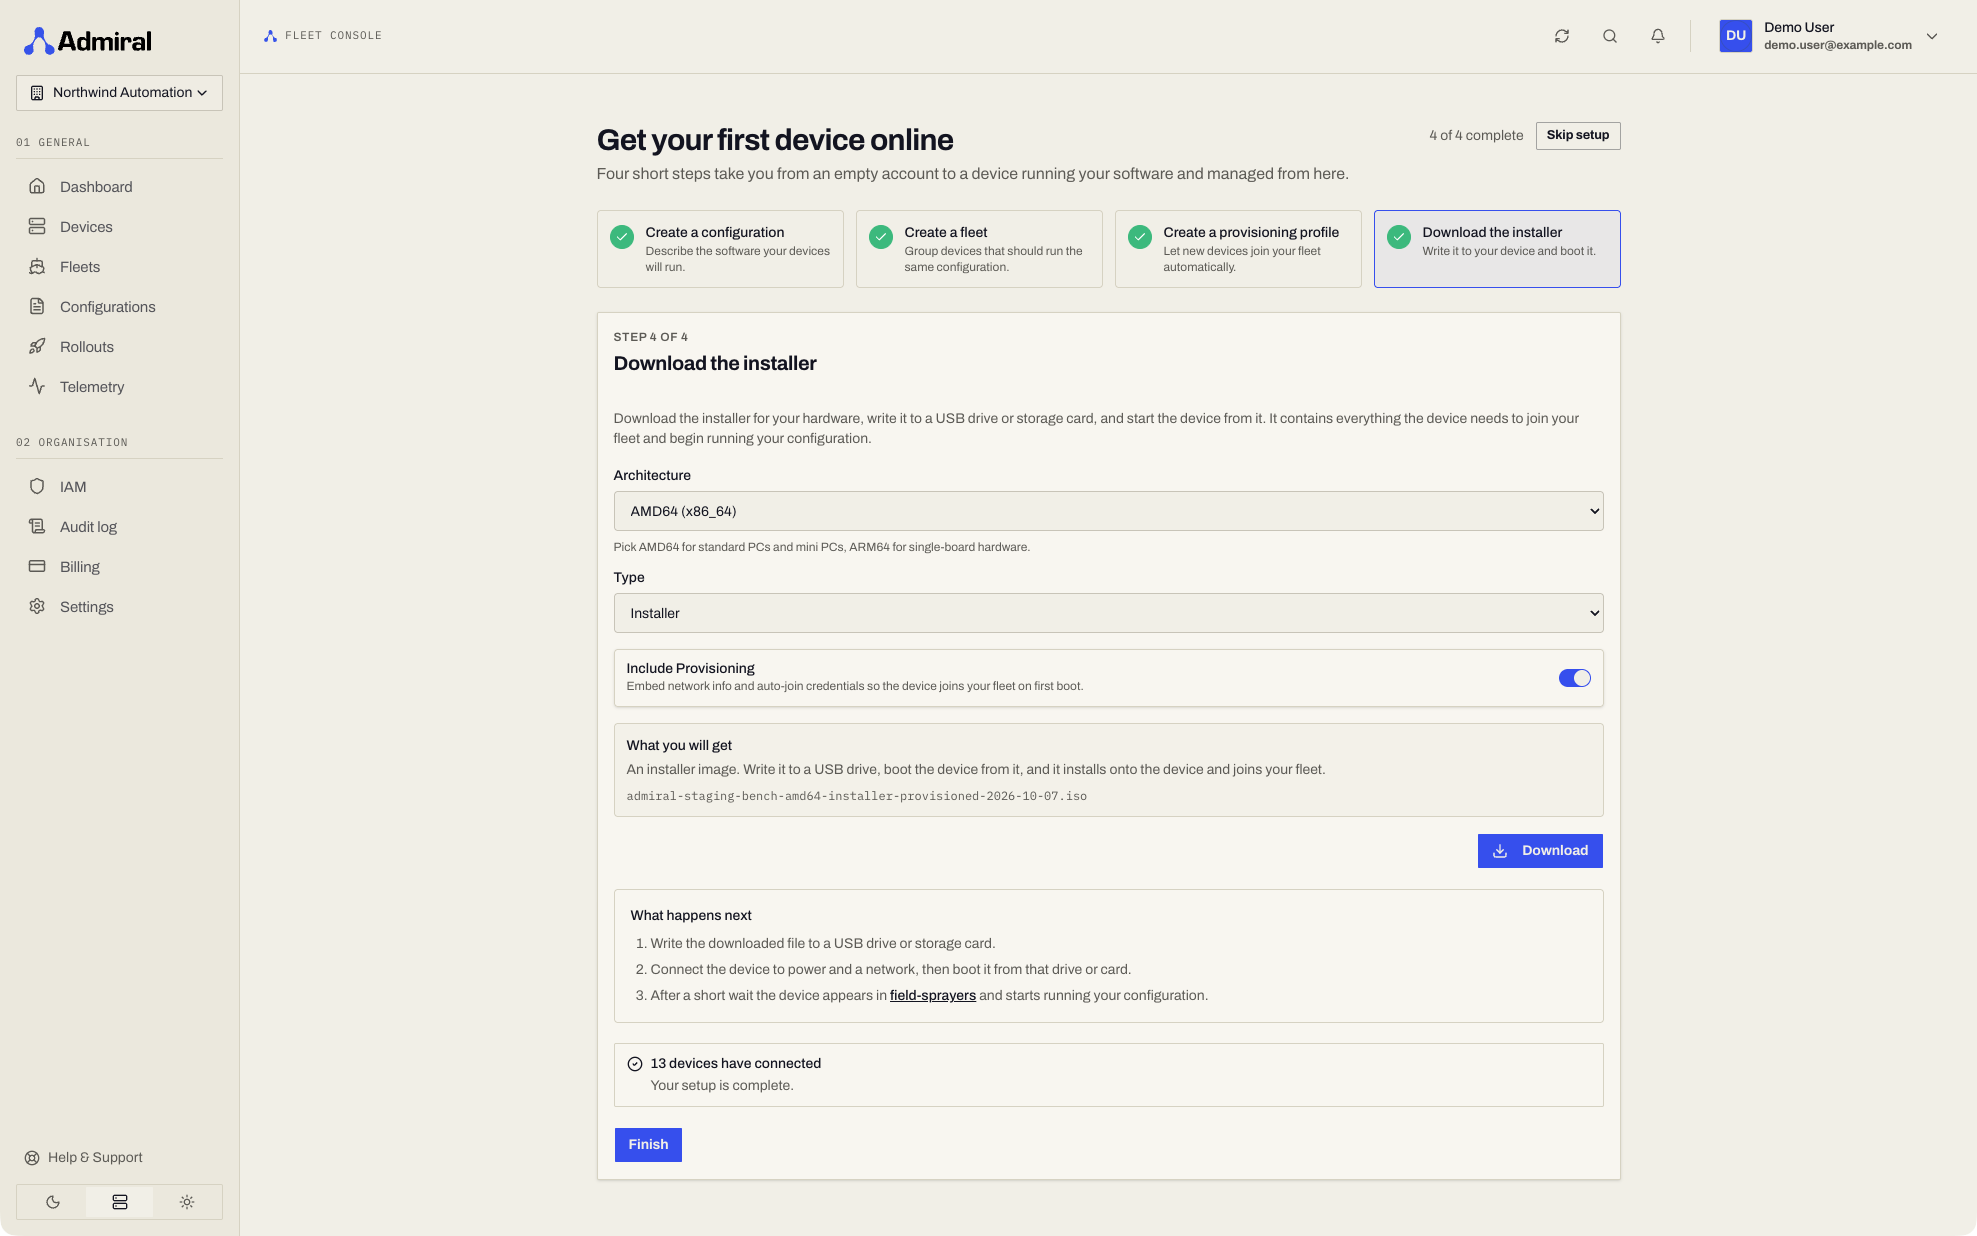
Step 4: Download the Installer
Choose the architecture, board, and image type, then download. See Download Options.
Write the image to a USB drive or SD card (Installation covers flashing), boot your device from it, and it appears in your fleet. The page shows Waiting for your first device... and updates when devices connect. Click Finish when you are done, or I will do this later.
Coming Back to the Guide
Until the guide is finished, the dashboard home page shows a Finish setting up card with your next step and progress. Continue setup returns to the guide; Dismiss shrinks it to a reminder strip with Reopen setup guide. The card disappears once the guide is complete or any device has joined.
The Devices, Fleets, and Configurations pages also show Start setup guide (or Continue with the next step) while they are empty.
Doing It by Hand
- Install Admiral OS. Download the Admiral Base OS image for your hardware (
x86_64orARM64), write it to the target media, and boot the device. See Installation. - Pair the device. Pairing (claiming) adds the booted device to your organisation. Type the key from the device's screen into the dashboard (Pairing), set up a headless device from your browser (Bluetooth Provisioning), or flash a pre-enrolled image that claims itself on first boot (Auto-Provisioning).
- Create a fleet. Open Fleets, create one, and assign your paired device to it.
- Deploy a workload. Open Configurations, create one, and assign it to your fleet. The device pulls the image and starts it.
Example Container
If you do not have a container ready, use the Admiral demo container.
| Source | github.com/AdmrlOS/admrl-demo |
| Image | ghcr.io/admrlos/admrl-demo/systemd-container:main |
| Architectures | amd64 and arm64 |
In the configuration editor, paste the image name into Workload Image. In the dashboard, Use example container in the create-configuration dialog fills it in for you.
What it does
The image is built from the repository's Dockerfile:
- Based on Ubuntu 26.04, with
systemdas the container's init process (CMD ["/lib/systemd/systemd"], stop signalSIGRTMIN+3). It is a system container, not a single-process one. - Installs the Ubuntu minimal GNOME desktop, with GDM set to log a user in automatically and Wayland enabled, plus Mesa graphics drivers (and the Intel media driver on
amd64) so it can render on the device's display. - Adds an OpenSSH server and basic network tools (
iproute2,ethtool,kmod). - Masks services that would conflict with the host (NetworkManager,
snapd, the full udev trigger, text-mode login) and limits udev triggering to display, graphics and input hardware. - Installs Google Chrome on
amd64only; Google does not publish anarm64build.
Use it on hardware with a display and a GPU to see a full desktop session started by Admiral. It is a demo for trying out the platform and is not intended for production use. Source and issues are in the repository.
Next Steps
- Roll changes out safely with Rollouts.
- Watch your devices in Device Operations & Monitoring.