Pairing Your Device
Pairing (claiming) adds a device to your Admiral organisation and assigns it to a fleet. There are three ways to do it:
| Method | Best for |
|---|---|
| Pairing key (this page) | A device with a screen that is already online. Type the key from its screen into the dashboard. |
| Bluetooth provisioning | Headless devices, or devices that need Wi-Fi set up first. Done from your browser. |
| Auto-provisioning | Batches and factory flashing. Devices claim themselves on first boot. |
The Pairing Key
When Admiral Base OS boots for the first time or after a factory reset, the on-device console shows the device's pairing key, a short code of 5 to 8 characters.
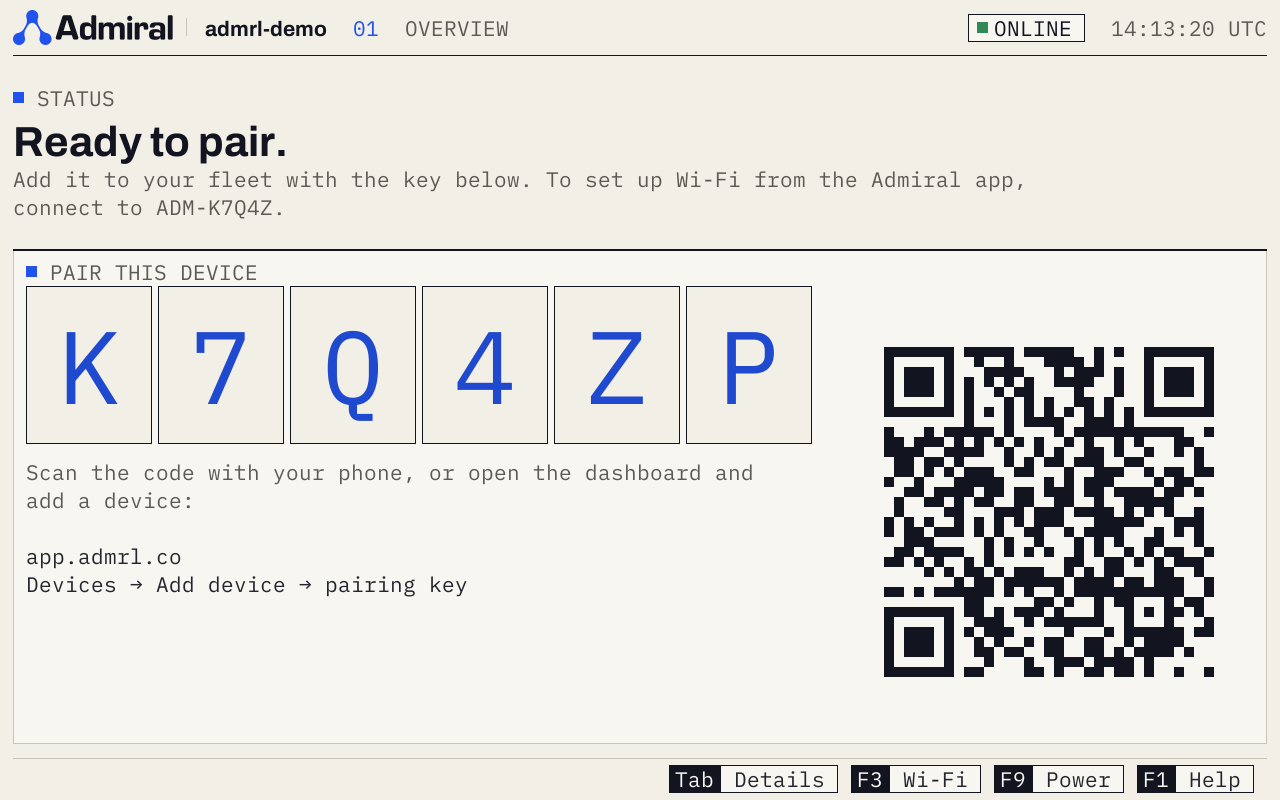
On the new on-device console, a QR code is shown next to the key. Scanning it opens the Add Host page with the pairing key already filled in and validated. If you are not signed in, you are taken to the sign-in page first and returned to the same page afterwards.
Pairing keys use the digits 2 to 9 and the letters A to Z except I, L, and O, so nothing can be confused with 0, 1, or each other. Keys are case-insensitive and do not expire, so hardware can be staged and claimed later without racing a timer.
Key characteristics:
- Character set: Case-insensitive, 5 to 8 characters, from
2-9andA-ZwithoutI,L, andO. - Non-expiring: Keys stay valid until the device is claimed.
- Identity: Bound to the device's unique hardware UUID.
The pairing key claims the device into your organisation. The 8-digit pairing code is different: it appears only during Bluetooth provisioning and confirms that your browser is talking to the device in front of you.
Adding the Device in the Dashboard
- Log in to the Admiral Dashboard.
- Navigate to Devices > Add Host (or click Add Host inside any fleet).
- Enter the pairing key displayed on your device. The dashboard validates it as you type.
- Provide a descriptive name (e.g.,
AMR-Warehouse-04orSydney-Kiosk-01). - Assign the device to a Fleet.
- (Optional) Provide geographic coordinates (latitude and longitude).
- Click Add Device.
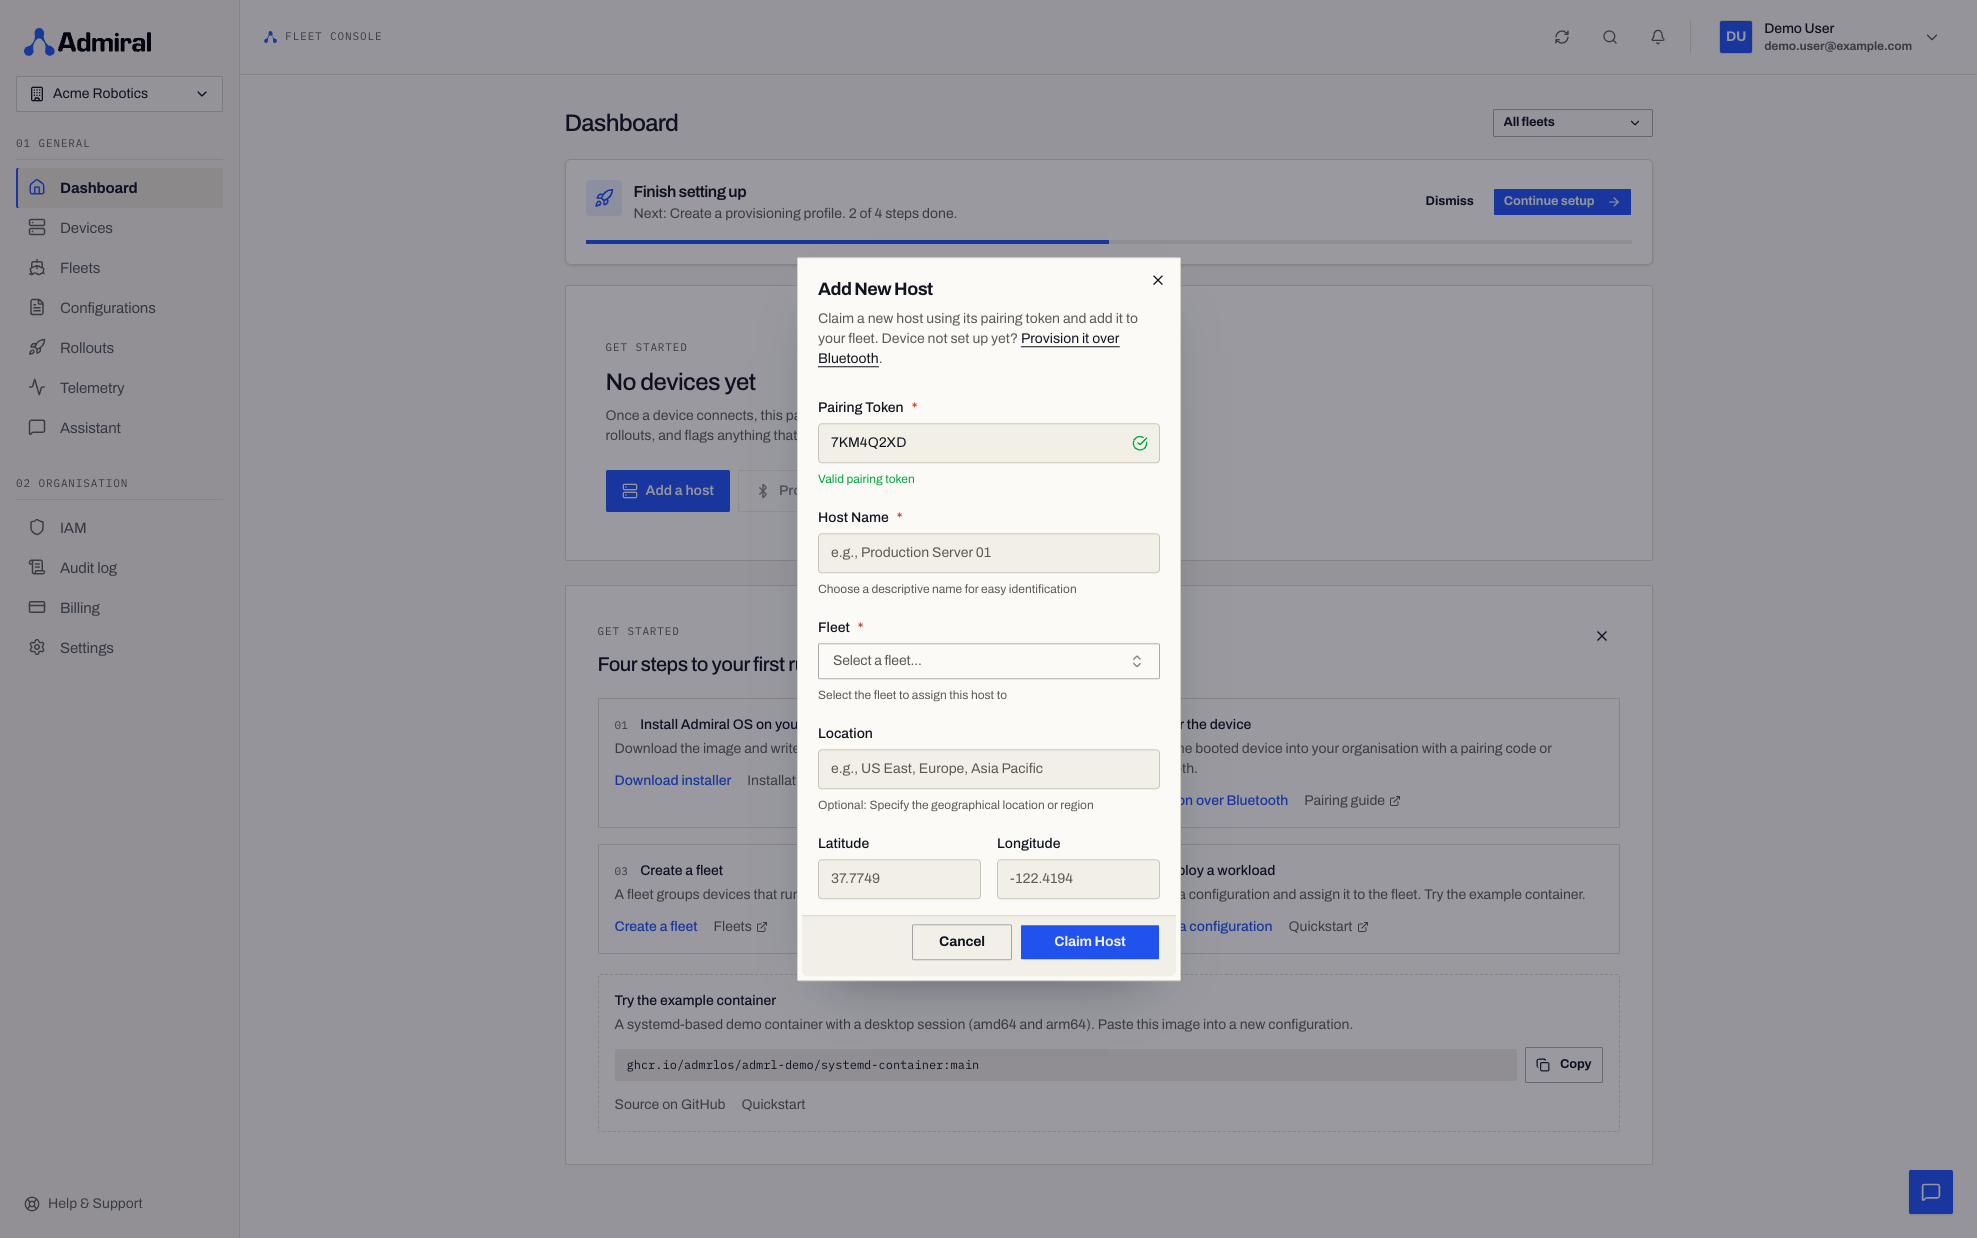
The device pairs with your organisation, connects to the Admiral Mesh, and appears in your fleet's device list.
What Happens After Pairing
Once claimed, the device moves straight into its operational lifecycle:
- Admiral Mesh connection: Connects to the Admiral Mesh with a credential scoped to its own identity and renewed daily. A device can never see another device's traffic.
- Configuration sync: Fetches the fleet's workload configuration and any secret files.
- Network sync: Applies the fleet's Wi-Fi networks in priority order.
- Image pull: Pulls the container image into a dedicated Copy-on-Write (CoW) subvolume.
- Hardware access: Passes through the
/devtree (motor controllers, SocketCAN, cameras, LiDAR, GPU accelerators) before starting the workload. - Telemetry: Begins sending metrics, logs, and security posture to Admiral Cloud.
A claimed device stops accepting open Bluetooth setup sessions. From then on, only users authorised in Admiral Cloud can connect to it over Bluetooth, through Field Service.
Troubleshooting
Key Not Accepted
- Check for typos. The dashboard normalises input to uppercase and filters out disallowed characters.
- Make sure the device has outbound network access. If the console shows Can't connect to Admiral, press F3 on a connected keyboard (or tap Wi-Fi in the bar at the bottom of a touch screen) to open the Wi-Fi screen, or use Bluetooth provisioning to set up the network from your browser.
Device Stalled or Offline
- Verify outbound network access. The Admiral Mesh automatically falls back from TCP to UDP and then to WebSocket over HTTPS port 443 to stay connected over restrictive or high-latency links.
- Run diagnostics on the device's screen (F2), or over Bluetooth from Field Service.