Download & Install Admiral Base OS
Admiral Base OS is available for traditional PC hardware (x86_64 / AMD64) and for supported ARM64 boards. This page covers downloading an image, flashing it, and the device's first boot.
1. Download the Image
Where downloads come from
Images are downloaded from a provisioning profile, so every image you download already knows which fleet it belongs to.
- Navigate to Fleets and select the fleet your devices should join.
- Click the Provisioning tab.
- Click Create Profile if the fleet has none yet (see Auto-Provisioning).
- Click Download on the profile and choose your options in the Download OS dialog.
New organisations can do all of this from the setup guide.
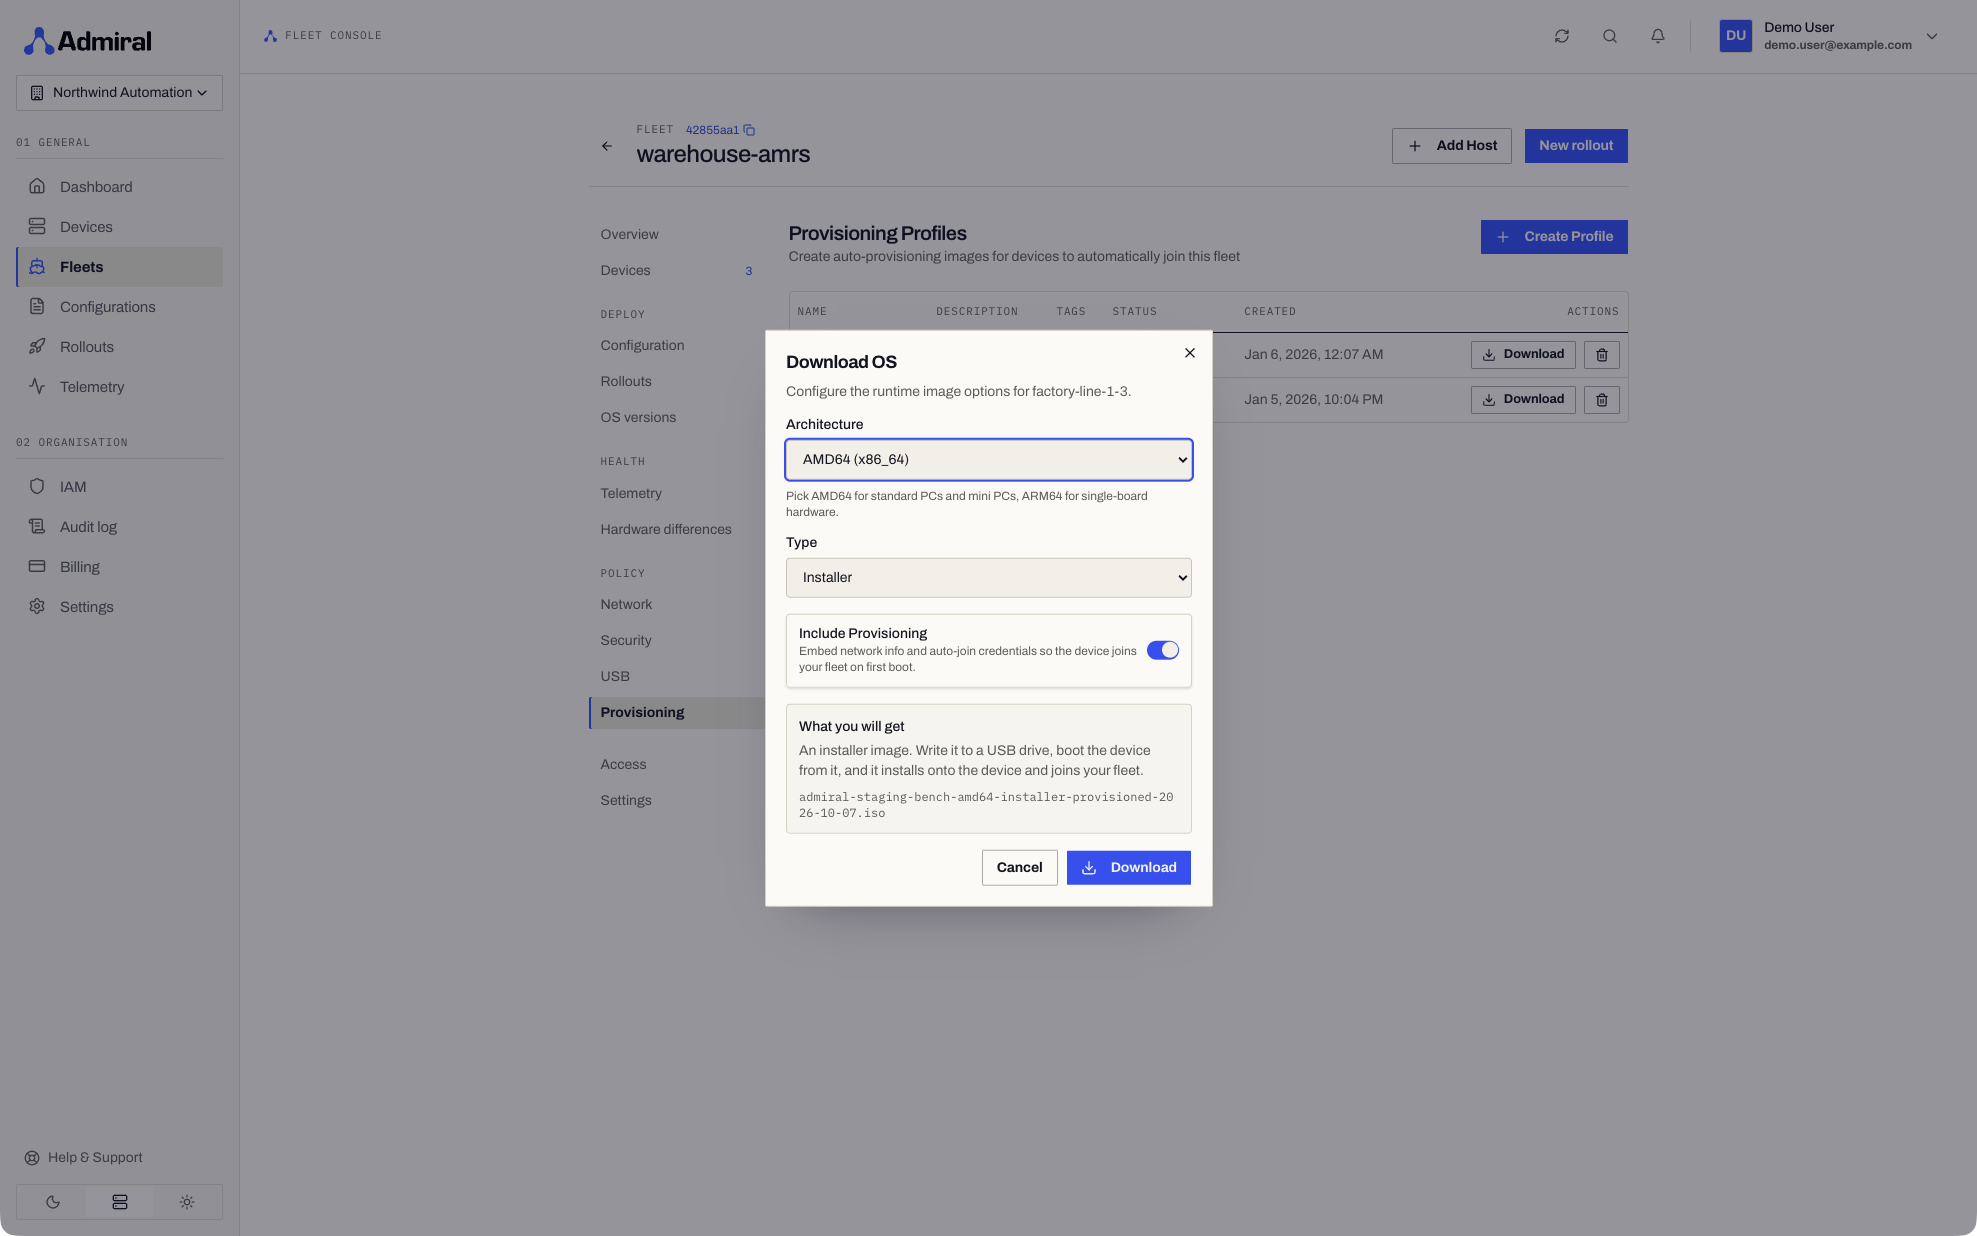
Download Options
| Option | Choices |
|---|---|
| Architecture | AMD64 or ARM64. |
| Board (ARM64 only) | Admiral Box or Admiral R36S. |
| Type | Installer or Disk Image. The R36S is only available as a disk image. |
| Include Provisioning | On by default. Embeds the fleet's enrolment details so the device joins your fleet on first boot with no manual pairing. Turn it off for a generic image that you pair by hand. |
The dialog shows the file you will get, for example admiral-<profile>-amd64-installer-provisioned-<date>.iso.
Installer (.iso on AMD64, .img on ARM64)
- Write it to a USB drive, boot the device from it, and it installs Admiral onto the device's internal disk.
- Best for PCs, industrial box PCs, and devices with internal NVMe or eMMC.
- On x86 machines with a TPM and Secure Boot enabled, the installer sets up encrypted storage.
Disk Image (.img)
- Write it directly to the device's boot storage (SD card, eMMC, or disk) and boot from it.
- Best for single-board computers, factory flashing, and mass provisioning.
Supported Boot Methods
| Hardware | Bootloader | Partition table |
|---|---|---|
| x86_64 PCs and servers | UEFI + signed GRUB 2 | GPT |
| NVIDIA Jetson Orin | GRUB 2 | GPT |
| Rockchip RK3588 | U-Boot | GPT |
| Rockchip RK3326 (R36S) | U-Boot | MBR |
| Allwinner | U-Boot | MBR |
2. Flash the Image
macOS & Linux
- Identify the target disk:
# macOS
diskutil list

# Linux
lsblk
- Flash the raw image:
# Replace /dev/sdX (or /dev/rdiskN on macOS) with your target disk
sudo dd if=admiral_base_latest.img of=/dev/sdX bs=4M status=progress
sync
Using dd will overwrite all partition tables and data on the target drive. Ensure you have targeted the correct drive identifier before running the command.
Windows
Using BalenaEtcher or Rufus:
- Insert your USB flash drive or SD card.
- Select your downloaded
.imgor.isofile. - Select your target USB/SD device.
- Click Flash! and wait for verification to complete.
3. Boot the Hardware
- Insert the installation media into the target edge hardware.
- Power on the machine and access the UEFI/BIOS boot menu (typically F12, F2, F11, or DEL).
- Select the installation media as the primary boot target.
- On UEFI x86 hardware, GRUB 2 validates the cryptographic signature (
grub.cfg.sig) and launches the Admiral init supervisor.
To have the device's storage encrypted, enable the TPM and UEFI Secure Boot in firmware before installing.
4. First Boot & Interactive Console
On first boot, Admiral OS initialises without systemd or distribution daemons:
-
Detects system hardware, loads modules, and starts device management.
-
If booted from installer media, the installer writes Admiral to the internal disk. The partition layout depends on the board:
Partition Size Purpose ESP 200 MB EFI System Partition with the signed bootloader (UEFI boards only). BOOT-A / BOOT-B 600 MB each Dual A/B system slots for atomic OS updates. ADMRL-DATA 1 GB Device identity and settings. ADMRL-MAIN Rest of the disk Copy-on-Write (CoW) storage for workloads, images, volumes, and secrets. x86, Jetson, and RK3588 boards use a GPT partition table; other ARM boards use MBR.
-
If the device has a usable TPM and UEFI Secure Boot is enabled, the main partition is encrypted with LUKS2 and its key is sealed to the TPM. See Device Security.
-
Brings up wired networking with DHCP (or uses saved Wi-Fi).
-
Starts the on-device console on the display, showing the pairing key, the device's status, and live hardware health.
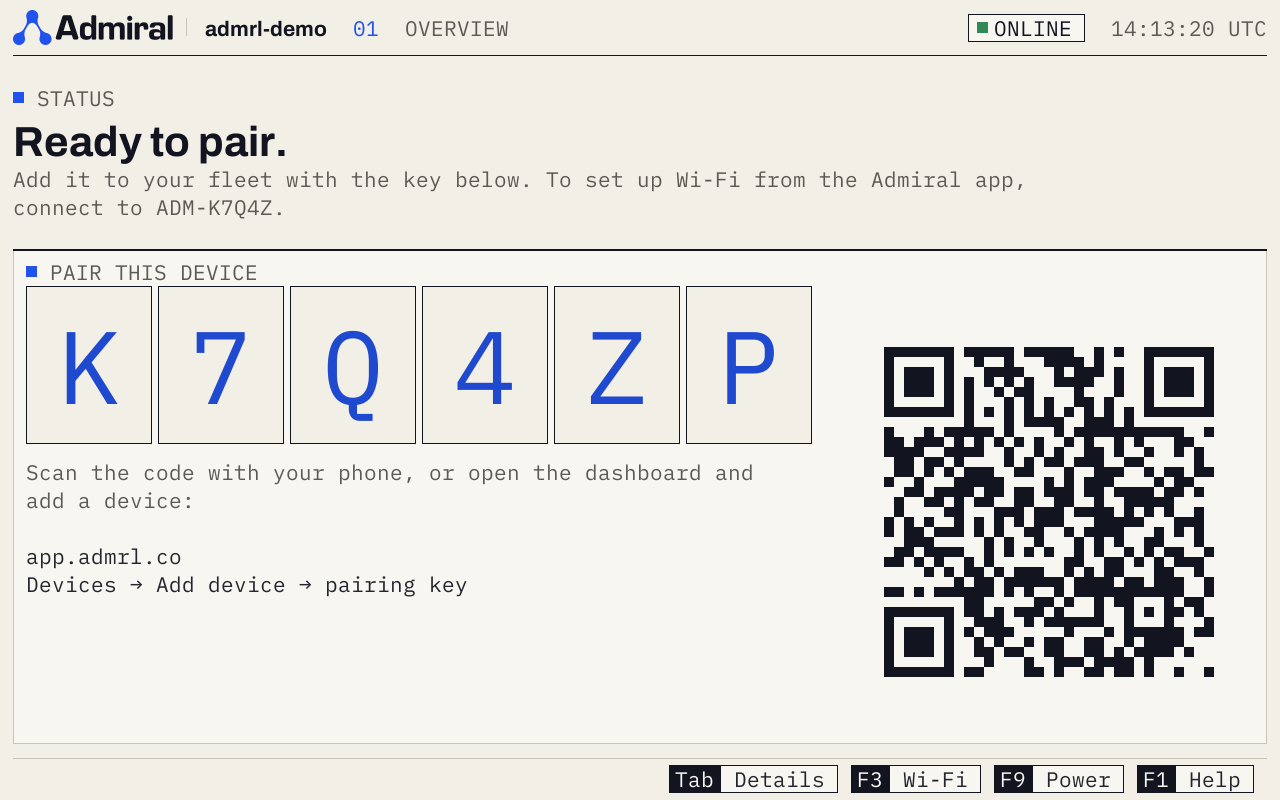
From the console, F3 opens Wi-Fi setup and F2 opens on-device diagnostics. See On-Device Console for every shortcut.
Next Steps
With your device booted and displaying its pairing code, proceed to Pairing Your Device to add it to your dashboard.